Push-ups, sit-ups, and a strict diet of raisins. That’s my plan.
Jack Black
It took me a long time to understand how to do a push up correctly. Everyone has their opinion of how to teach a push up. To be absolutely honest with you, I actually learned how to correctly perform a push up when I started taking Yoga years ago. I discovered that every time we were told to do a sun salutation, what we were actually doing was the eccentric part of a push up. I would lower my body to the floor, hover for a brief second then push myself to up dog and then down dog. The more I did this, the easier it got. Eventually, all the eccentric work paid off and I found myself able to not only lower my body to the floor correctly, but also push myself back up. When my back started bothering me, I stopped doing Yoga. But I did not stop working on my push ups. In fact, when I started lifting and training more seriously, my push ups became even easier. I was squatting, deadlifting, pressing and benching. My body was getting stronger which meant my “core” was stronger, which meant my push ups were getting better. But isn’t the push up an upper body exercise you would say? Well, yes….and no. It is a full body exercise and, in my opinion, one of the best bodyweight upper body pressing exercises you can do for yourself and your clients if you are a trainer. It definitely separates the men from the women and the women from the girls. And it is all about creating stability in your trunk. Without a stable body, there is no way one can perform a decent push up. The tighter your body, the better your push up. Hands down.
So what to do?? How do you train a push up? For the majority of women out there (and a handful of guys), push ups are just plain hard to do and when they do them, they are downright ugly. And I mean, nasty.
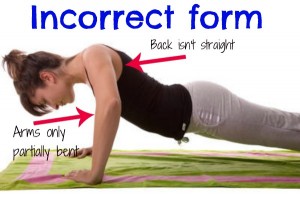
The hips dip, the arms bend at the top, the glutes are loose, the belly is hanging out. Why? No trunk stability. They have not learned to fire the correct muscles in order maintain a good, stable position. When I say fire, I mean abdominals, glutes, shoulders…I told you it was full body!
So, what does a proper pushup look like? Check out the video below. Notice that the trunk is rigid, the elbows are tucked close to the body, the glutes are engaged, the head is in line with the trunk, and the upper arm is parallel with the floor at the bottom of each repetition.
Proper pushup form
It bears emphasizing that the elbows should be tucked close to the trunk, and not flaring out as is commonly seen in most gyms. When you flare your elbows, you put undue strain on your shoulder joint, which is not good in the long run, as you will likely develop shoulder pain. By tucking the elbows, you relieve the pressure on the shoulder joint, and make the exercise more healthy and effective at the same time. Here’s a video of me flaring my elbows badly. Please do NOT do your pushups this way. 🙂
Bad pushups with flared elbows
If you want to read an in depth article about the push up, look no further than Bret Contreras’ article here. It explains very well why people cannot properly execute a push up, the mechanics behind the push up, and the differences between men and women when it comes to the push up. For my purposes, I am giving you the short and sweet version of how we train the push up at Fivex3 Training.
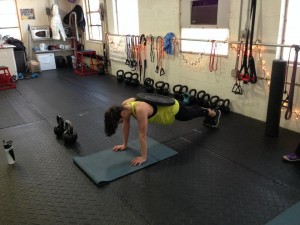
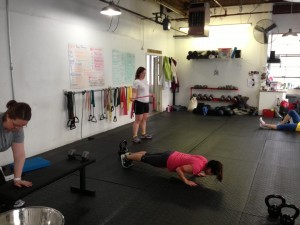
There are a few methods that we employ here. In our group classes, we primarily train the push-up using negatives, the eccentric part of the push-up. In order to perform a negative pushup, start with a front plank, and lower yourself to the floor while keeping your body completely rigid. For our group classes, this is the most effective way to work because we don’t have a lot of room for people to be scattered around doing some of the more involved things described below. Negatives are great because they teach you to control your body while performing the pushup motion. We start training the pushup once our group clients can hold a solid plank for at least 45 seconds to one minute. Up until that point, they do not have sufficient trunk stability to move on to pushups. After all, a pushup is nothing more than a plank with arm flexion and extension. If you cannot hold a proper plank, you will not be able to do a proper pushup.
With the negative push-up, you are not only getting good upper body strength – triceps, chest, shoulders, serratus anterior – but you are training the body to remain rigid and stable, the major component when learning how to do a push-up. Too many people focus all their attention on the arms and expect them to do the work instead of focusing on the bigger picture…the entire body from the shoulders all the way down to the toes. A strong position – trunk tight, glutes engaged, shoulders packed – is the foundation of a good push-up. When most people fail the push-up, it is not because they are weak in the arms; they are weak in their trunk and glutes. Take a look at the following two videos. In the first one, I am performing an eccentric (negative) pushup with bad form. Hips sag, belly sticks forward, shoulder blades wing. It looks awful. In the second, you can see what the exercise should look like when performed correctly.
Bad eccentric pushup
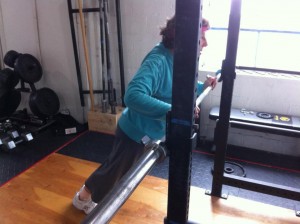
If I have older individuals, such as my mom’s friend Linda who is 73 years old and just started strength training with me this past year or members who are overweight and unable to maintain good form in their planks due to their weight, I will incorporate incline push ups using a barbell on the power rack. The height of the bar determines the level of difficulty and the goal is to lower the bar a little bit each time they work. This way, they can work on their push up position without worrying about injuring themselves on the floor. Of course, this works well with any individual who has difficulty performing a push up but in a group setting, it is harder to use this way as it requires a lot of moving the bar up and down for each person. I rather stick to the negatives with my clients as most of them are between the ages of 20 and 50. Check out the video below to see how to perform this variation.
Pushups with hands elevated on bar
Pushup with assistance from an overhead band
Pushup with short band around the elbows
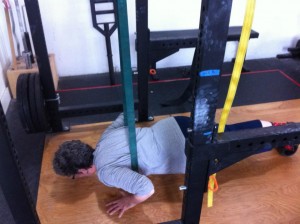
If you are interested in purchasing bands for assistance with the pushup, you can get them from Iron Woody Fitness or Elitefts . These bands are also extremely useful for assisting with the chin-up or pull-up. But that is for another article. 🙂
Good luck, and let us know how you fare!
